My favorite homemade fermented salsa – ready in 2 days. For this salsa, you don’t need any fermentation skills, nor special equipment or any starter culture. Just veggies and salt, that’s it.
It is super easy to make! This fruity salsa with tomatoes pairs well with just about anything – think cheese boards, tortilla chips or for BBQ.
Ever since I have developed a fermented salsa recipe for my cookbook ‘Die Welt im Einmachglas’ (‚the world in a jar‘), I have been obsessed with fermented salsas.
Easy fermenting recipe for beginners
If you have never fermented anything in your life before, start right here. This recipe is so easy, everyone can make it.
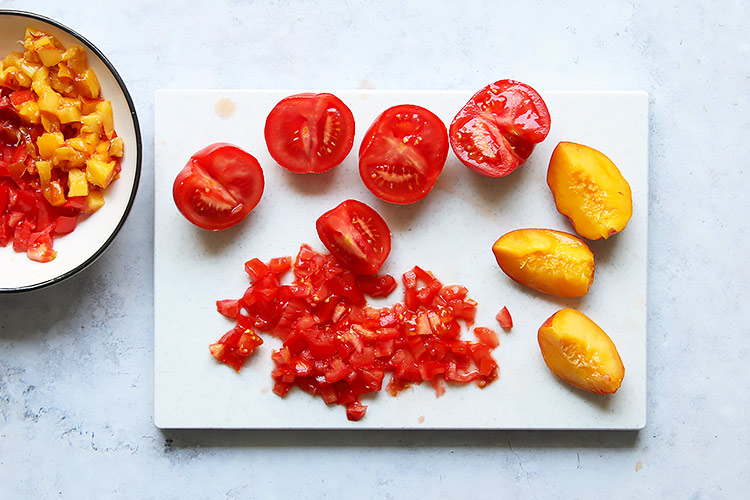
You have to chop some veggies – I used tomatoes, peaches and a small amount of onion here.
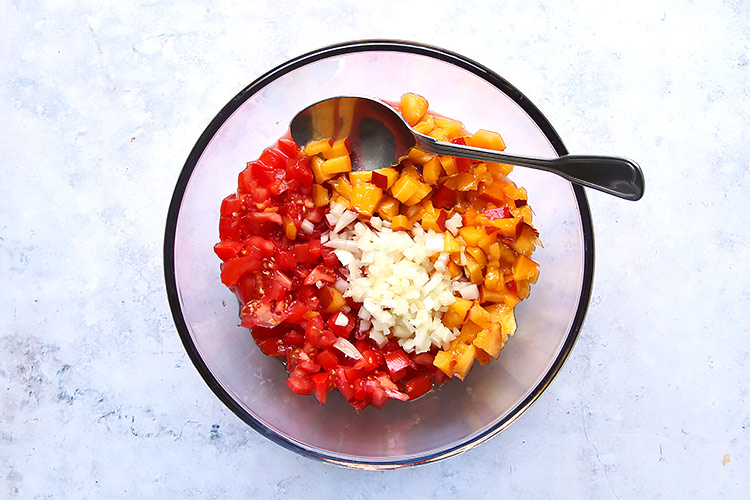
Put everyting in a bowl and mix well.
Mix the chopped veggies with salt. Toss to thoroughly combine. Taste the salsa and add a pinch more salt if it tastes bland.
Put chopped veggies in jars and let ferment for 2 days.
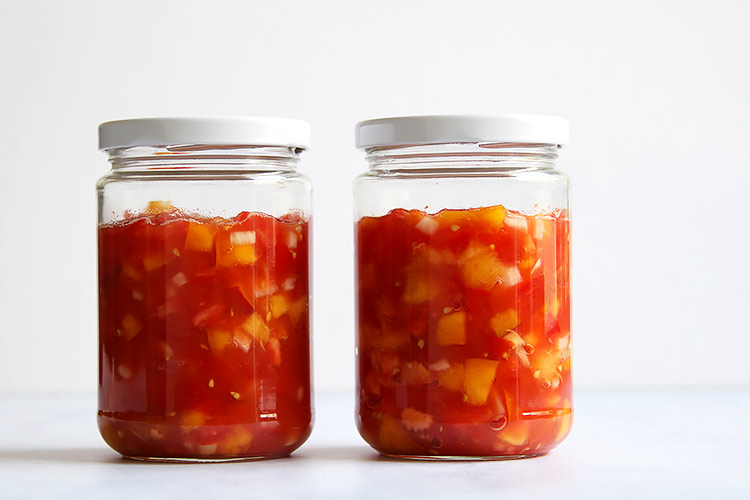
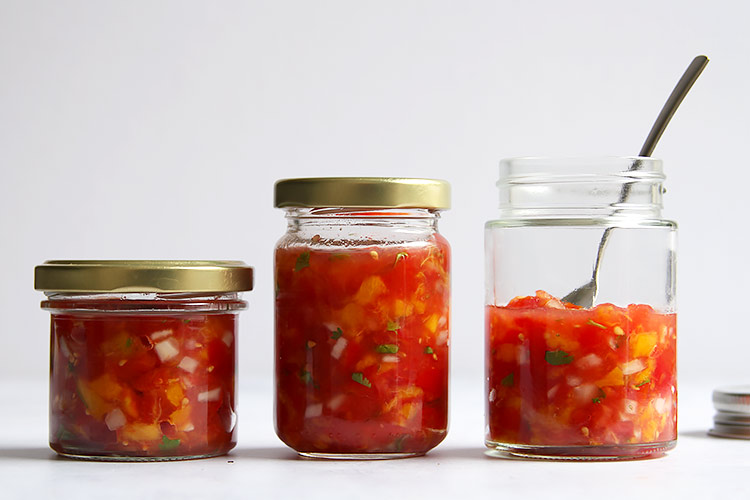
Divide the mixture including the juices between air-tight glass jars, leaving an inch of head space. I usually use two empty jam jars with screw tops. Mason jars with fermentation lids or wire-bale clamp jars work well too. You can use one large jar or several smaller ones.
Press the salsa down with a spoon in the jar. The veggies will probably not be fully submerged in the juice, no worries. Since this salsa is only fermented for a few days, it is ok.
Tightly seal the jars and place on the counter in your kitchen (away from direct sunlight). Place a plate below the jars since they could overflow during fermentation.
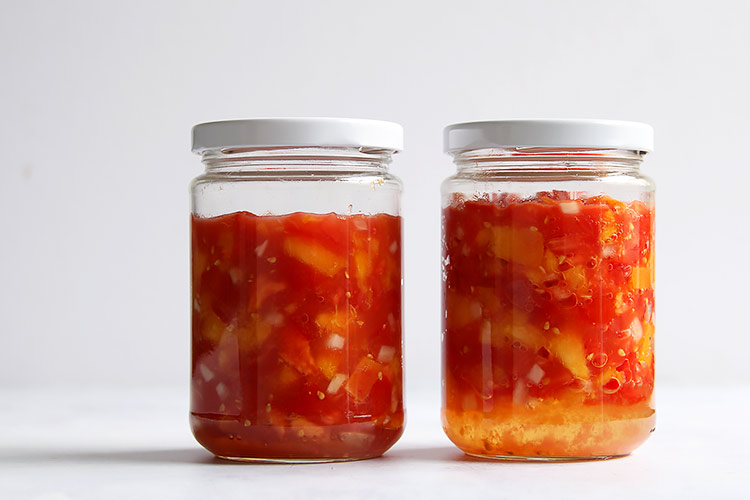
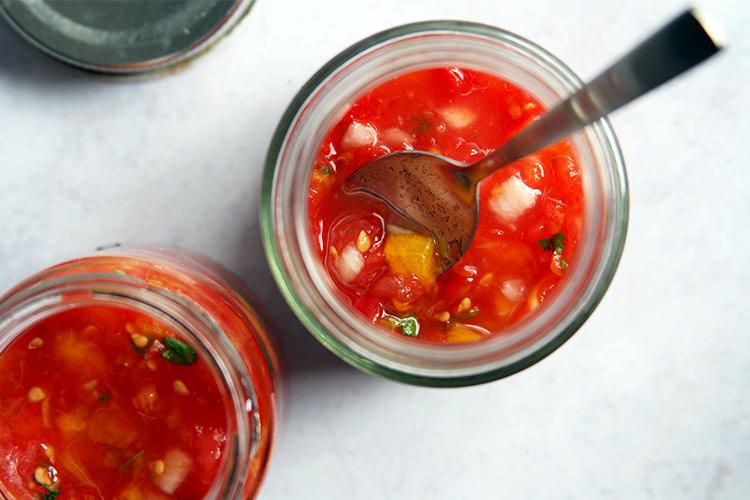
After 2 days: Due to fermentation, the salsa will get active and bubbly, somtimes the liquid separates (see right picture).
Ferment the salsa at room temperature for 2 days. Stir once daily (every 24 hours). During this time, the salsa will ferment due to the natural presence of lactic acid bacteria – the good bacteria also known as probiotics.
After a day or two, bubbles are sometimes visible in the salsa. When you open the jar, you may hear a ‚pop‘ or hissing noise. The vegetables may be separating from the liquid, which is normal.
All of these signs mean that your salsa is active and fermenting, as it is supposed to. Stir it, and try it. If you like the flavor, it is ready. If it’s not tangy enough for you, leave it another half day or day or even two days to ferment (see notes in the print-recipe below).
Recipe for easy fermented salsa.
Store in the refrigerator. The fermentation process slows down in the fridge, but the flavor will continue to develop and the salsa will continue to get tangier.
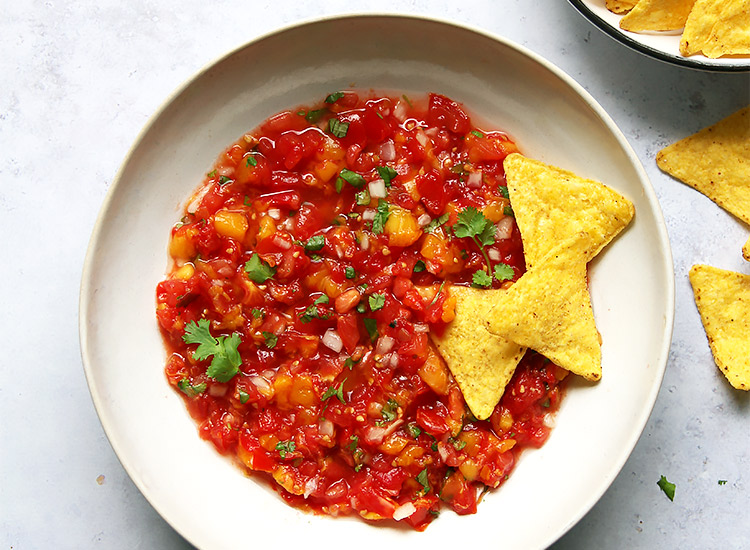
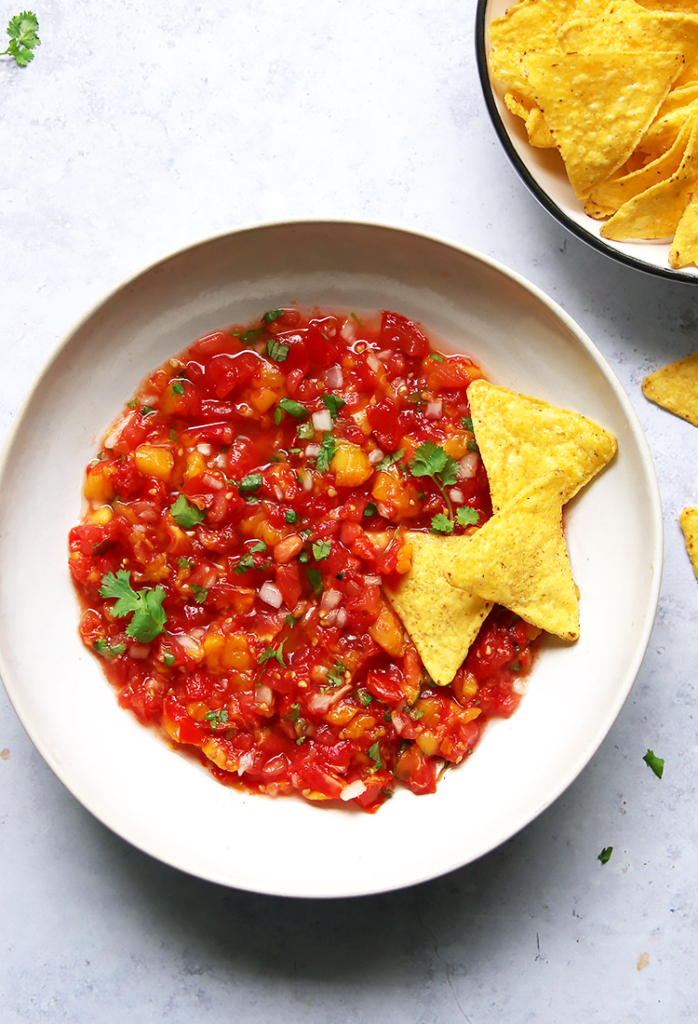
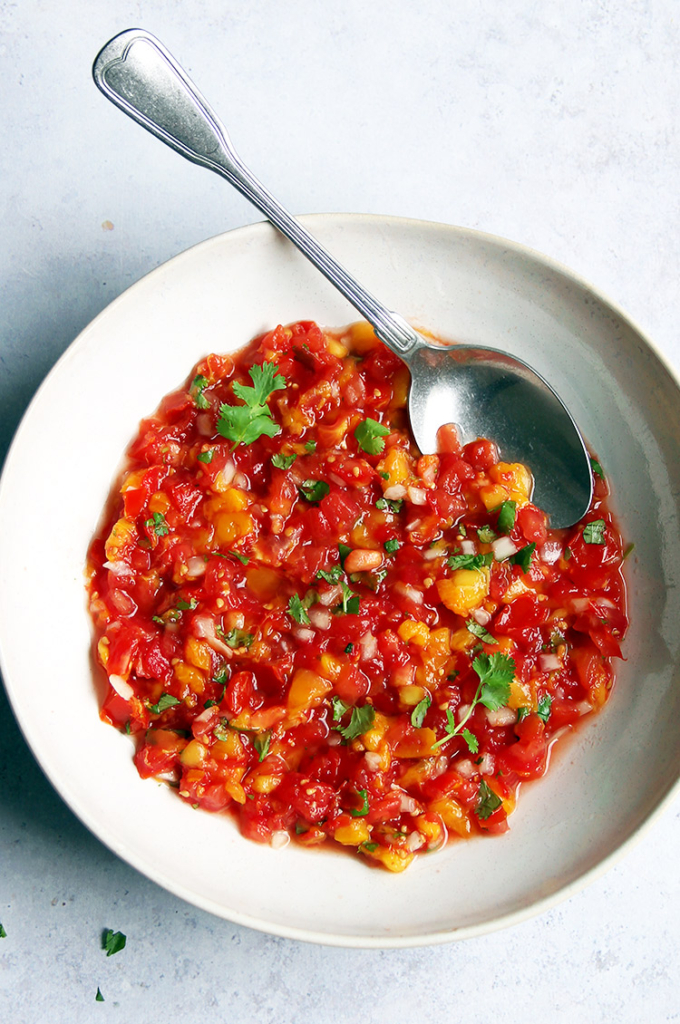
Serve salsa with tortilla chips. But then again, this fruity tomato-salsa pairs well with just about anything (sandwiches, cheese board, …), and makes a great condiment for BBQ.
Pros of fermented salsa
Why not just eat salsa raw, you may ask? Why ferment salsa? Well, there are several reasons why you would want to ferment salsa.
Delicious taste: Fermenting salsa gives it that slightly tangy, full-bodied, amazing flavor. You can decide for yourself if you want your salsa with just a hint of tang or a little more sour. The longer you let it ferment, the tangier it gets.
Longer shelf life: The fermentation process results in a longer shelf life. Your salsa will keep several months. Fresh salsa will go bad after several days.
Texture: Due to fermentation, the texture will become perfectly salsa-like, chunky but at the same time creamy. This is ideal for dipping and scooping. I love this salsa with crunchy, briefly heated tortilla chips or as topping for loaded nachos!
Healthy probiotics: Fermented foods are rich in probiotic bacteria, which boost nutritional value and gut health. Lacto-fermented foods are an easy and natural way to populate your gut with good bacteria.
Beginner-friendly: Everybody who was scared of fermentation so far and never dared to try it, should start with this salsa. Not only is it ready to eat in 2 days, it is also super easy to make and tastes amazing. You can also make a small jar, just to try if you like it. This may be the recipe that sparks your fermenting obsession ;-)

Have fun fermenting!

")
My favorite fermented salsa – ready in 2 days. It is beginner-friendly, no fermentation skills or special equipment needed. Just veggies and salt. It is super easy to make! This salsa pairs well with just about anything – think cheese boards, tortilla chips (loaded nachos!) or BBQ. It is a mild and fruity salsa but of course, you can add a chili for some heat.
Recipe: Ursula | lilvienna.com
Ingredients
- 2 peaches (1/2 lb or 220 g) (you can also use nectarines or apricots)
- 1 lb (450 g) tomatoes
- 3 tablespoons (30 g) finely chopped onion
- 1 tablespoon lemon juice (alternatively lime juice)
- 1/2 teaspoon fine salt
- Optional, but recommended: 1-2 tablespoons finely minced cilantro *
Instructions
- Wash tomatoes and peaches. Cut tomatoes in half, remove the stem and finely dice them. Cut peaches in half, remove the pit and finely chop them too. To speed things up, you can use a food processor (onion might get bitter). Finely mince onion by hand.
- To a bowl, add the chopped tomatoes and peaches, lemon juice, and salt. Toss to thoroughly combine. Taste the salsa and add a pinch more salt if it tastes bland.
- Divide the mixture including the juices between air-tight glass jars, leaving an inch of head space. I usually use two empty jam jars with screw tops. Mason jars with fermentation lids or wire-bale clamp jars work well too. You can use one large jar or several smaller ones.
- Press the salsa down with a spoon in the jar. The veggies will probably not be fully submerged in the juice, no worries. Since this salsa is only fermented for a few days, it is ok.
- Tightly seal the jars and place on the counter in your kitchen (away from direct sunlight). Place a plate below the jars since they could overflow during fermentation.
- Ferment the salsa at room temperature for 2 days (48 hours). Stir once daily (every 24 hours). After a day or two, bubbles are sometimes visible in the salsa. When you open the jar, you may hear a ‚pop‘ or hissing noise. The vegetables may be separating from the liquid, which is normal. All of these signs mean that your salsa is active and fermenting, as it is supposed to. Stir it, and try it. If you like the flavor, it is ready. If it’s not tangy enough for you, leave it another half day or day or even two days to ferment (see notes).
- As soon as you like the taste of the salsa, it is ready to enjoy. I usually stir in the minced cilantro at this point (see notes).
- Serve salsa with tortilla chips. But then again, this fruity tomato-salsa pairs well with just about anything (sandwiches, cheese board, ...), and makes a great condiment for BBQ.
- Store salsa jars in the refrigerator. The fermentation process slows down in the fridge, but the flavor will continue to develop and the salsa will continue to get tangier. I like it best within 2 weeks, although it can keep for months.
- Check the jars in the refrigerator regularly. Due to fermentation, gas can build up. If the jars’ lids swell up, ‚burp‘ them, meaning unscrew the lid slowly to release the pressure (gas is hissing out), then screw it tight again. Just burp them and do not open the lid entirely too often since this can cause kahm yeast (see notes). Alternatively, do not seal the jars too tight so that air can escape. If gas can not escape, the jar could burst. This never happened to me but I urge you to keep an eye on the jars.
- Open jars over the sink because the jar may fizz and overflow due to CO2 produced during fermentation.
- I prefer salsa when it is rather thick and not watery, so I often just take the solid veggies from the top of the jar. I leave the water in the jar though since the salsa keeps longer this way.
- If you do not use the entire jar, push the veggies back into the water with a clean spoon before putting it back in the fridge.
Notes
How long to ferment?
The fermentation process and progress largely depends on the room temperature. Temperatures between 68 and 77°C (20-25 °C) are ideal. I only make this salsa in summer when tomatoes and stone-fruit are in season and are ripe and flavorful, so I usually ferment at 75-77 °F (24-25 °C) for 2 days. If your kitchen is cooler, the fermentation might take slightly longer.
White layer on top: If you notice a thin white film on top of your salsa, remove it and stir the salsa every 12 hours instead of every 24 hours, and store it a bit cooler. The white layer forming on top of ferments is called kahm yeast. It is harmless and sometimes occurs when the fermentation temperature is too warm. Other reasons that can lead to kahm yeast are that the batch is not acidic or salty enough or if it is over-exposed to oxygen (jar only half full or opened too often).
* Cilantro: I add the minced cilantro after 2 days of fermentation, right before I place the salsa in the fridge. This way, it tastes freshest. You can certainly add it right in the beginning with the rest of the ingredients.

The recipe that you have shared is just amazing I am surely making this recipe and pass it on to my friends and famiyl as well, I am sure my son will surely love this recipe.
Hi Supriya,
I’m so happy that you like the salsa. I love it too :-) I put it on everything haha. Ursula