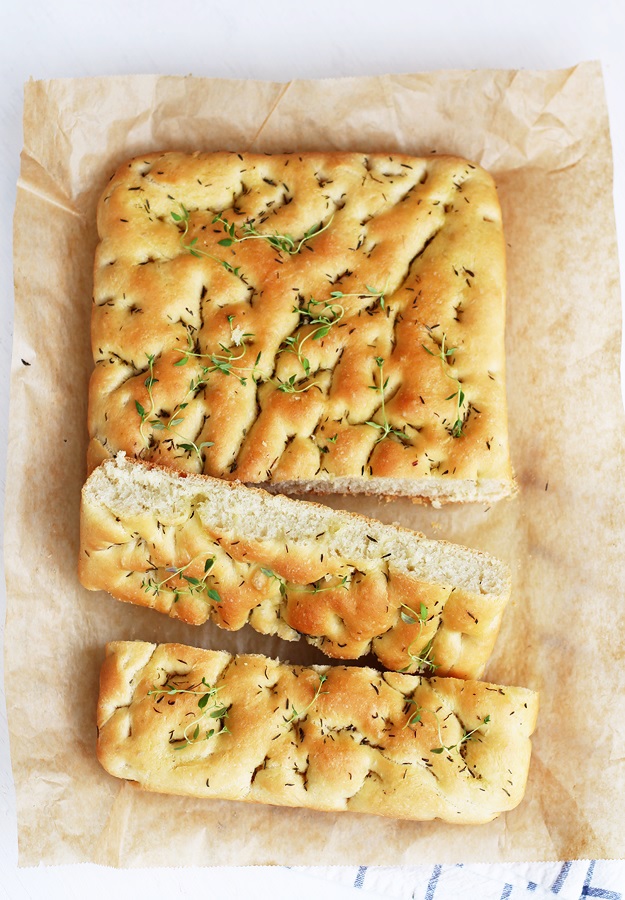
Learn how to make a thick, soft, and fluffy focaccia. It’s not dense or chewy at all. This focaccia has a fine crumb and a tender crust, which makes it a perfect side for BBQs, the perfect bread to go along with hummus, or simply to use for an Italian-style sandwich.
We just returned from a few days of vacation in southern Italy, which is only a short hop from Austria. I am always most enthusiastic about the food when traveling. So David picks the places to visit and I pick places to eat and local dishes not to miss.
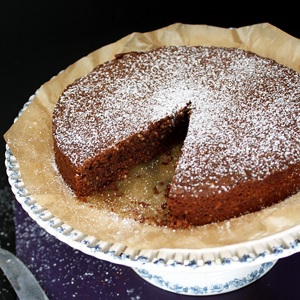
We ate pizza in Naples, stuffed ourselves silly with arancini (fried rice balls, yum) and ordered chocolaty torta caprese on every occasion possible. So when we got home, I was in the mood to cook Italian food.
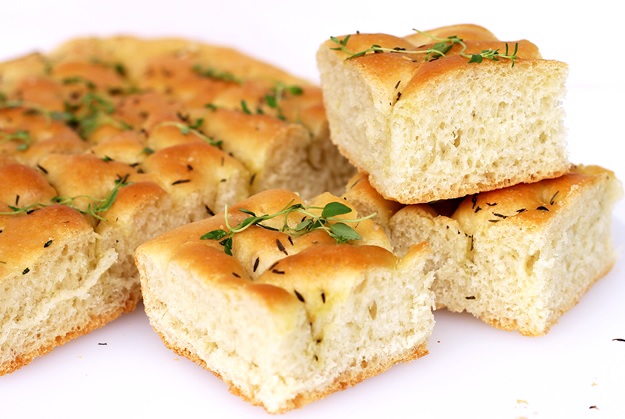
Fuss-free fluffy focaccia
I’ve been making this simple focaccia for years. It’s such a reliable, fuss-free, quick and easy focaccia recipe that I don’t even want to try other recipes. And I do recipe developing for a living ;-)
So, what do I mean when talking about a fluffy, light focaccia? When cut into squares, you can squeeze the focaccia until flat and deflated, and it will inflate and rise into the original state (see video), without losing pieces of crackly, crunchy crust. Because there isn’t any.
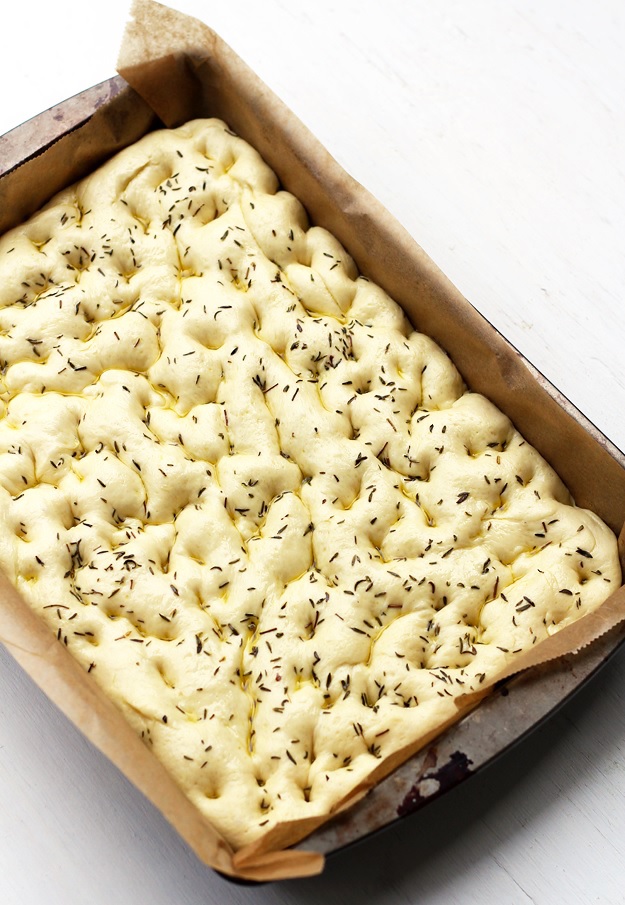
Focaccia before baking.
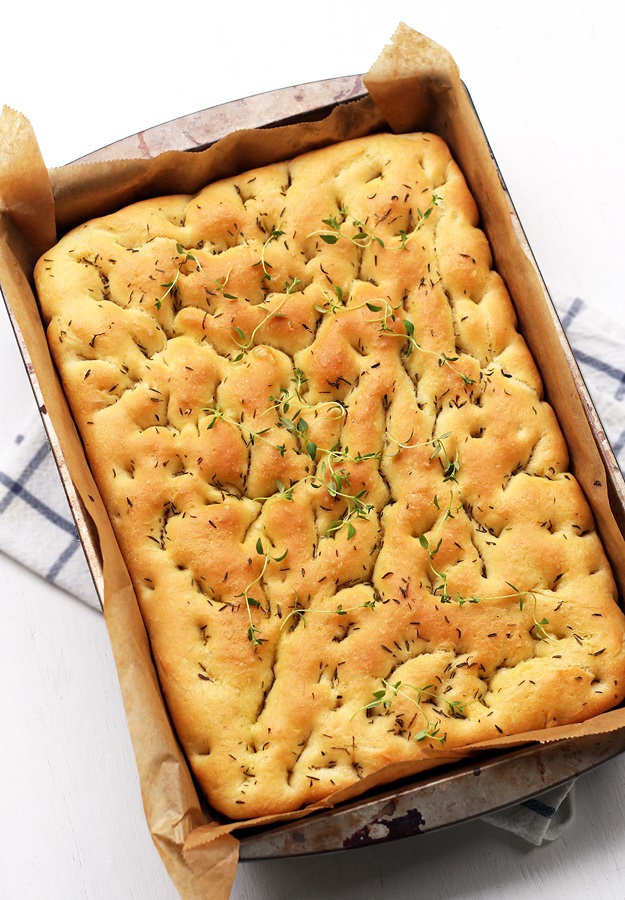
Focaccia right after baking.
Quick focaccia with a fine crumb
From start to finish, it takes 1 to 1.5 hours, which is super quick considering that focaccia bread is made with yeast. So when I don’t really have time to do a cold overnight rise, or if I am in the mood for a soft white bread, this is my go-to recipe. It yields a very fine and tender crumb due to the quick rise, compared to an open crumb with big holes you’ll get from a long, cold rise.
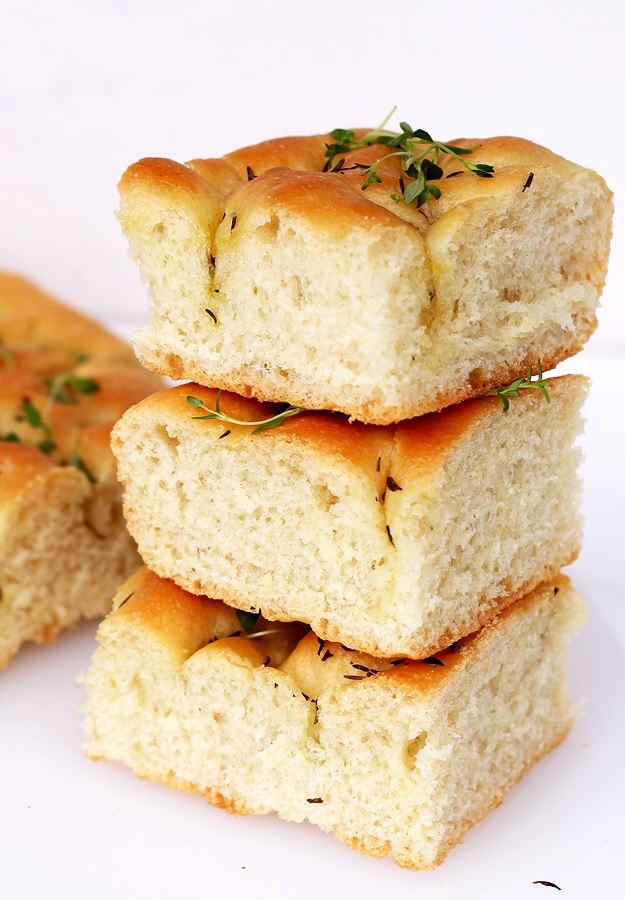
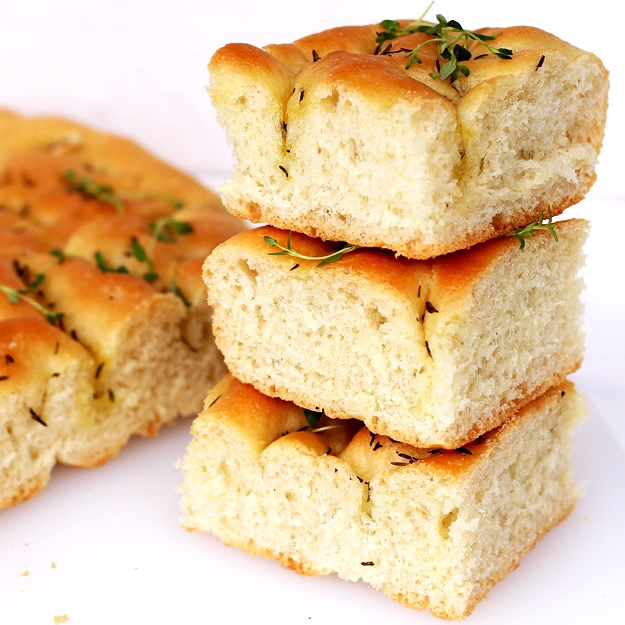
When using the right-sized pan, you’ll get a thick, well risen focaccia. I used a 9-by-13 inch (33×23 cm) baking pan, which, for the amount given below, results in a focaccia that is about 2 inch thick (4-5 cm).
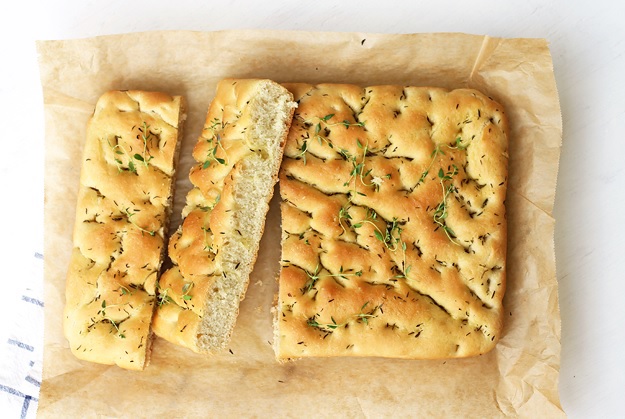
I sprinkled the focaccia with dried thyme since I always have it on hand, but you can adapt it in any possible way. Think rosemary or other (dried) herbs, a combo of cherry tomatoes and basil, semi-dried tomatoes (dreamy!), potatoes and onions, or simply coarse salt.
Learn how to make a thick, soft, and fluffy focaccia. It’s not dense or chewy at all. This focaccia has a fine crumb and a tender crust, which makes it a perfect side for BBQs, the perfect bread to go along with hummus, or simply to use for an Italian-style sandwich.
I sprinkled the focaccia with dried thyme, but you can adapt it in any possible way. Think rosemary or other (dried) herbs, a combo of cherry tomatoes and basil, potatoes and onions, or simply coarse salt.
Recipe: Ursula | lilvienna.com
Ingredients
- 1 cup plus 1 tbsp (255 ml) warm water
- 2 teaspoons (5 g) active dry or instant yeast
- 1 ¼ teaspoons (8 g) fine salt
- 2 tablespoons (25 g) olive oil
- 3 cups (400 g) all purpose flour
- 1 tablespoon olive oil plus more for greasing bowl and pan
- 1 teaspoon dried thyme (or other herbs)
- A few sprigs of fresh thyme, optional
Instructions
- Add warm water to a large mixing bowl. Sprinkle yeast on top and wait until dissolved (30 seconds for instant yeast, a few minutes for active dry yeast). Add oil and salt.
- Add roughly half of the flour and vigorously stir with a cooking spoon for about 1 minute. Add the remaining flour and work it in with the spoon. When the ingredients come together, knead by hand for about 8 minutes, either directly in the bowl or on a lightly floured surface. The dough is rather sticky but if possible do not add additional flour, which makes the focaccia less fluffy.
- Generously oil a clean bowl with olive oil. Put the dough in and turn it around until coated in oil. Cover the bowl tightly (with a lid or cling wrap) and let it rise until doubled, for about 30 minutes at warm room temperature (in summer). It will take a little longer when colder.
- Line a 9x13 inch (33x23cm) pan with parchment paper and additionally grease with oil. Carefully transfer the risen dough to the pan and try to gently stretch it evenly without deflating the dough until it fills the baking pan.
- Drizzle the dough with 1 tablespoon of olive oil and evenly distribute it on the surface with your fingers. Sprinkle dried thyme over the dough, then dimple it with your fingers.
- Let the dough rise a second time for 20-30 minutes until notably puffed. No need to cover during rising since the dough is oiled and won’t dry out. >> If you want to skip the second rise, see note.
- Bake focaccia in the preheated oven at 400°F (200°C) until golden brown, about 15 to 20 minutes. Cool baked focaccia bread for at least 10 minutes before slicing, better a little longer.
- Top with fresh thyme if you like and cut into slices. Enjoy!
Notes
Skipping the second rise:
I’ve also tried to skip the second rise with success - even with a heavy topping of fresh cherry tomatoes. If you want to go that route, do not preheat the oven, instead put the pan into the cold oven right away after topping it with olive oil and thyme (or your topping of choice). Set the oven to 400°F (200°C) and bake until golden brown, about 25 to 30 minutes, depending on how fast your oven heats up.
Did you follow this recipe? You could share your result here. All you need to do is take a picture with your smartphone and send it to [email protected]Theresa: Tried your receipe. Very yummy!
Sandra: This recipe is a total keeper, thank you so much. I added 1 tsp of sugar sprinkled on top of the water and yeast to allow the yeast to grow faster. Then followed the recipe as written. I kneaded the dough for about 5 mins. Let it rest for 5 minutes. Then used a rolling pin to roll it out to the size of my baking sheet. I let it rise under a towel for 15 mins. Then pressed dimples into it with my fingers, rubbed olive oil onto the top and sprinkled with garlic powder and ground rock salt. I put it directly into a 400 degree oven for 20 mins. It came out perfect. Wonderful slightly cruncherier our crust just the way I love it but with a wonderful soft center. And it was so fast. A perfect weekday quick bread to go with so many different meals.
Sinem: I tried you focaccia recipe with olives; My mom and me loveeee it!😍😍😍 Thank you 😌 -Sinem
Daniel: I tried your recipe this afternoon. It went well. Very easy and simple. Thank you for sharing it with me. Daniel


I tried this just now and the bread turned out really good. but just a little hard on the outside. I always expected this bread to come out soft. but still a quick and simple to follow recipe because I usually make the worst bread. haha
Hahaha ;-)
Hm, usually the outside is not really hard. Just a little more than the fluffy center. But I guess, this largely depends on the oven. It’s should be just like a focaccia that you can buy at a deli. You know, those that are perfect to use for sandwiches since you can easily have a bite without destroying the entire sandwich cause the outside is to firm….. Glad you like it.
Other recipes ask for sugar or honey so is there any reason your recipe doesn’t have it? Also instead of mixing it by hand can a mixer with a dough hook be used instead?
It will be my first time making focacia so would like it to work the first time. 😊
Hi Tanya,
I know that a lot of yeast recipes add a little sugar to the dough. But it is not necessary. If you want to add a pinch, of course you can. And yes, you can also make it in a stand mixer. Simply follow the instructions but instead of stirring and kneading it with your hands, let the mixer w/ dough hook do all the work. Hope you’ll try it.
Great, I ended up using a small amount of honey and used the mixer with a dough hook and it worked out perfectly. I’ll be keeping this recipe and will make another batch with different toppings ie. olives, garlic, sun dried tomatoes. Thanks!
Hi Tanya,
Happy to hear that it worked out well. Oh, there are endless combinations of toppings. I vary every time :) Cheers, Ursula
Hi Ursula,
I used a different recipe to make the dough (5 cups of flour) but using your suggestion with a 9×13 inch baking tray – the recipe was initially to make a thinner foccaccia on a 17×13 inch tray but I like my foccaccia thicker. Any tips? Will it still work in a 9×13 inch baking tray? the dough is about 0.8 inch thick atm when putting it in a 9×13 inch tray.
Kawai
Hi Kawai,
The focaccia will rise quite a bit during baking, so if using a dough containing 5 cups of flour, this will yield in a very thick focaccia :) I would say that a 17×13 inch baking tray would be kind of perfect for that amount of dough. But since you already made it, I hope it turned out good? Sorry for my late reply, btw. I didn’t notice it…. Ursula
Can I pre-make this and place in the oven when I’m ready to cook?
Hi Kristy,
Yes, absolutely.
You can make it the evening before and simply put the dough in a greased bowl (tightly cover with cling wrap) in the fridge overnight for rising. The next day, transfer to a baking dish – see step 4-8. Let me know if you have further questions. Ursula
Used this as my very first try to make something like bread and it turned out really nice! I used a bit of sugar because of the yeast I used but everything ended up plush with a bit of chew. Your recipe made me so excited to get into baking. Thank you so much!
Hi Kate,
So happy to hear that! This focaccia is great for experimenting. I love it with a topping of grape/cherry tomatoes too :-) Hope you’ll make many more ☺️
Question, how many servings does this make and how long does it take with 2 risings?
Hi Carolyn,
This will make a 9×13-inch pan. So, depending on what you are panning to do with it (sandwich, side dish, appetizer w/ olive oil,…) the serving size varies. I’d say 6-12 servings.
@ If you so 2 risings, it will approx. take 1.5 hours in a warm kitchen (longer if your kitchen is rather cool since it takes the dough longer to rise).
Hope this helps!
Ursula
The first rising took 1 hour (humid New England). 2nd rising 45 minutes – same as most bread recipes. Tasty, still relatively quick.
Hi Joan,
Good to know! And thanks so much for the comment.
Ursula
PS: If you want to make a really quick focaccia, simply omit the second rising. I know this feels kind of wrong, but it works :)
Hi I just tried making this and although the dough rose on the first proving, I did not get much of a rise from the second one. It also didn’t really brown all that much.
I’m not sure what I’m doing wrong. Do I need to put a water bath in the oven, let my price for longer? Knead it more? Etc
Hi Matthew,
So sorry for my late reply – I didn’t notice your comment. Sometimes, if the dough overproofs on the first rise it has troubles with the second rise. Might this have been the case? If not, add a full package (7 grams or 2 1/4 teaspoons) instant or active dry yeast the next time an put the pan in a slightly warm oven for the second rise. Often times, this helps a lot.
Concerning the browning: I have noticed, the browning largely depends on the oven. When I made this focaccia in my mom’s oven, it didn’t really brown either, it just got harder. In my oven it gets a nice golden crust with either top and bottom heat or fan. You can try baking it in the upper third instead of the center rack. Hopefully, this helps! All the best, Ursula
Just made this and it literally melts in your mouth! Absolutely amazing and will be saving this recipe for sure!
Hi Joanne,
So happy that you tried the recipe and that you liked the focaccia. And thanks so much for letting me know. Hope you‘ll make it again some time :-)
Ursula
Hi! What setting do you choose for your oven when baking this focaccia? Is heating coming from up? up and down? with a fan or without? I think I am not getting the texture right because of the oven, so any additional info would help :) Thank you!
Hi Adina,
I made the focaccia in the picture with bottom heat only at 400F (200C) – in an old crappy oven. Ever since, I’ve made it with top and bottom heat – same temperature – and in a fan oven (heat coming from the fan, no top and bottom heating elements with 375F/180C). I prefer the 400F/200C with top and bottom heating. Hope this helps.
Some of the people that made the focaccia have reported back, that it doesn’t brown properly but rather stays pale. Was this your problem too? Because I think this depends on the oven. You can always move it a little closer to the top heating element, if this happens (but always have a close look on it). Ursula
Hi there,
I was wondering what to use instead of yeast? I am anaphylactic to yeast, but would really love to still use this recipe.
Thanks
Hi Olivia,
So far, I have always used yeast in this recipe, so I can’t really tell you what will work best. I’d try making it with baking powder, use the ingredients above (minus the yeast) and 2.5 teaspoons baking powder instead. Knead a dough, no rising time, put it in the pan and proceed as indicated in the recipe. Not sure if it will come out less fluffy though. Also, baking time might vary slightly. Hope this works! Ursula
Oh MY, it looks great! Can’t wait to cook em this Sunday!
First time ever making foccacia, my mother-in-law makes it all the time and there’s no way I can compete with hers, but this was a great first start. I made it a bit bigger (ie used a little more flour etc) because my pan is 10 x 14.5 :) It was pretty good, but I should have used more olive oil on top & more of the tomato & garlic mix (as my mother in law does).. All in all it was pretty yummy.
Hi Annette,
So happy that you made the Focaccia. I bet more of the tomato-garlic-mix is a great idea! I love this focaccia with all kinds of toppings, especially tiny grape tomatoes. But often times I simply make the basic version from the recipe above. This way it will be a great side dish to almost any meal :) Thanks so much for your comment!
Ursula